M'key - a durable open source smartcard emulator

Did you ever wish for a cheap, durable and secure way to store your GPG keys for signing and authentication? I sure did! So I made this: a USB dongle based on the GNUK open source project which emulates a smartcard reader via HID. Support for RSA-4096 is built in, but usage of RSA-2048 is recommended.
Works on Linux, MacOS and Windows.
Hardware
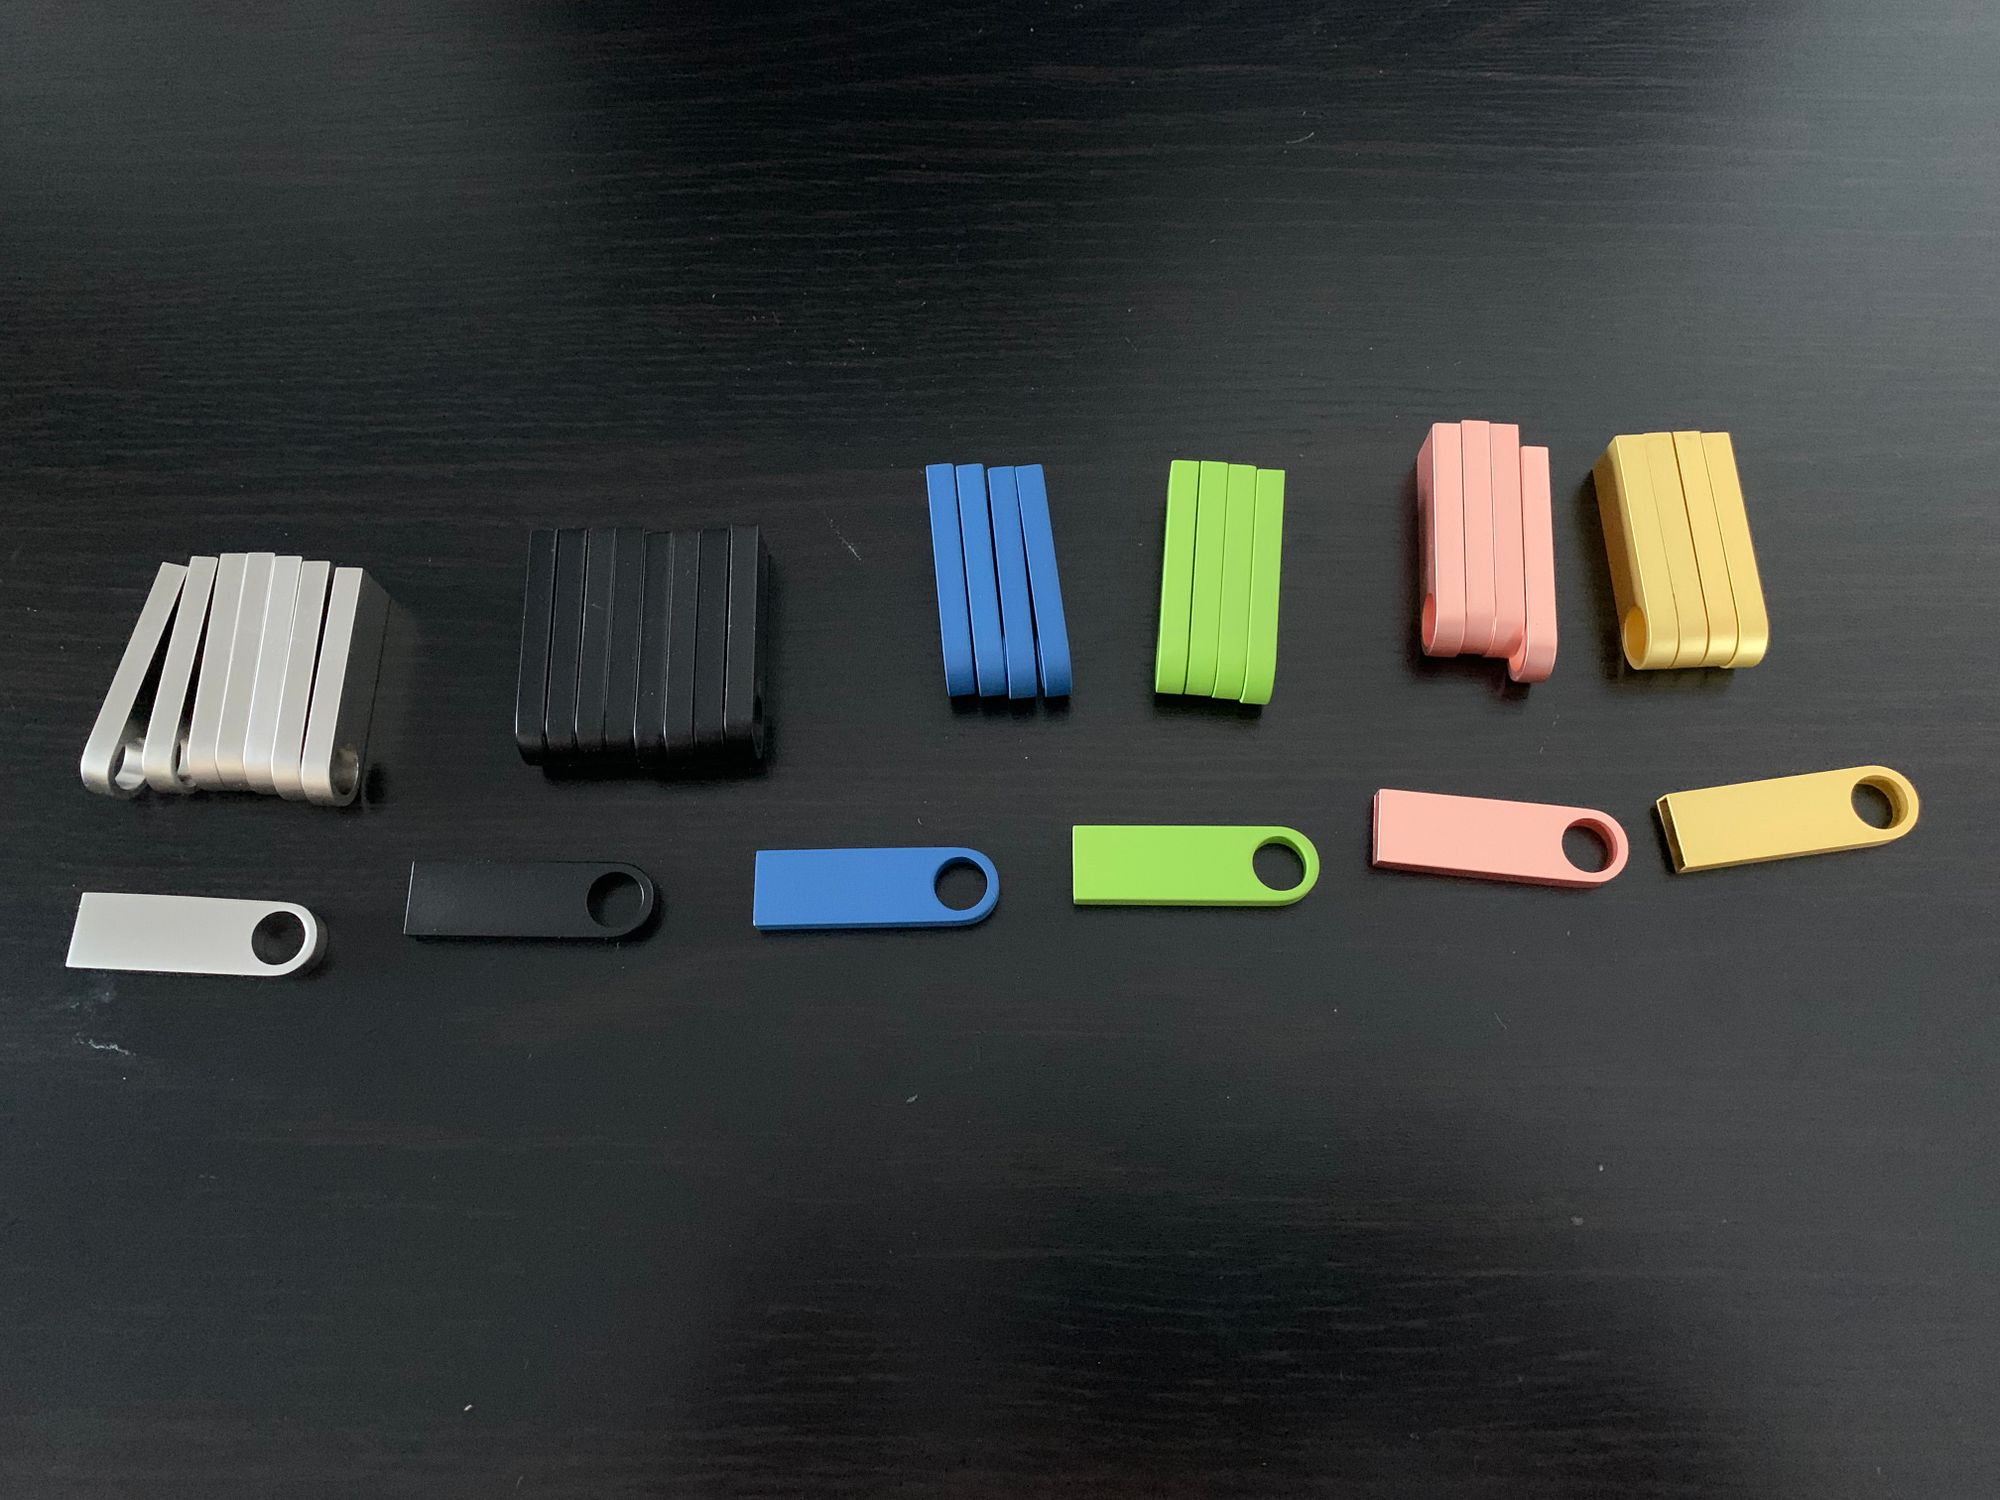
The key consists of two main parts: a tiny PCB embedded into a metal shell manufactured in China. The shell is made of a corrosion resistant alloy, seems to be used mainly by Kingston for their USB flash memory and is available in multiple colors from a seller named China ACCALIA Store on Aliexpress. I contacted the seller directly about buying only the shell without the flash memory part and got a quote of 1$ per shell. As a bonus you get a plastic zipper bag for each key and free custom engraving for large orders.
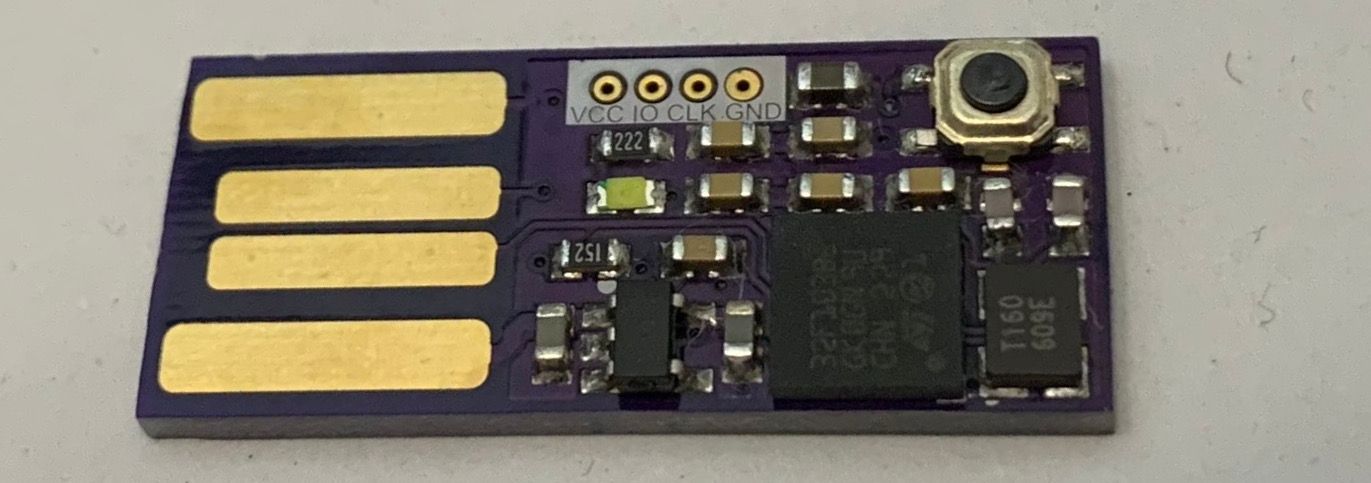
On the electronics side we have a STM32F103RBH6 in a tiny 5x5mm BGA64 package, the requisite crystal, bypass caps and a 3.3v voltage regulator. One LED and a button are included and can either be used for the default GNUK purposes (indicator light, confirmation button) or as additional IO when using the key with an alternative firmware. There is a controllable pull-up on D+, so you can force re-enumeration of the device during operation.
The 4 layer PCB uses the OSHPark design rules which also works for most other fabs. Because most cheap prototype services do not allow microvias, normal vias are used for some clustered VCC and GND pins. 5mil traces won't fit through the pads either, but since minimal I/O is used (and USB/HSE is on the outer edge) it still works out.
Remember to choose gold plating (ENIG works fine) as finish, otherwise the USB contacts will wear out very quickly. It also makes soldering the BGA package so much easier.
Software
M'key uses an unmodified GNUK build. A board file has been created and will hopefully be merged into the main project at some point.
Assembly
You need:
- a soldering station with exchangable tips (I recommend JBC)
- a hot air station
- solder (<= 0.5mm highly recommended)
- flux pen
- tweezers
Optional:
- flux paste
- solder paste
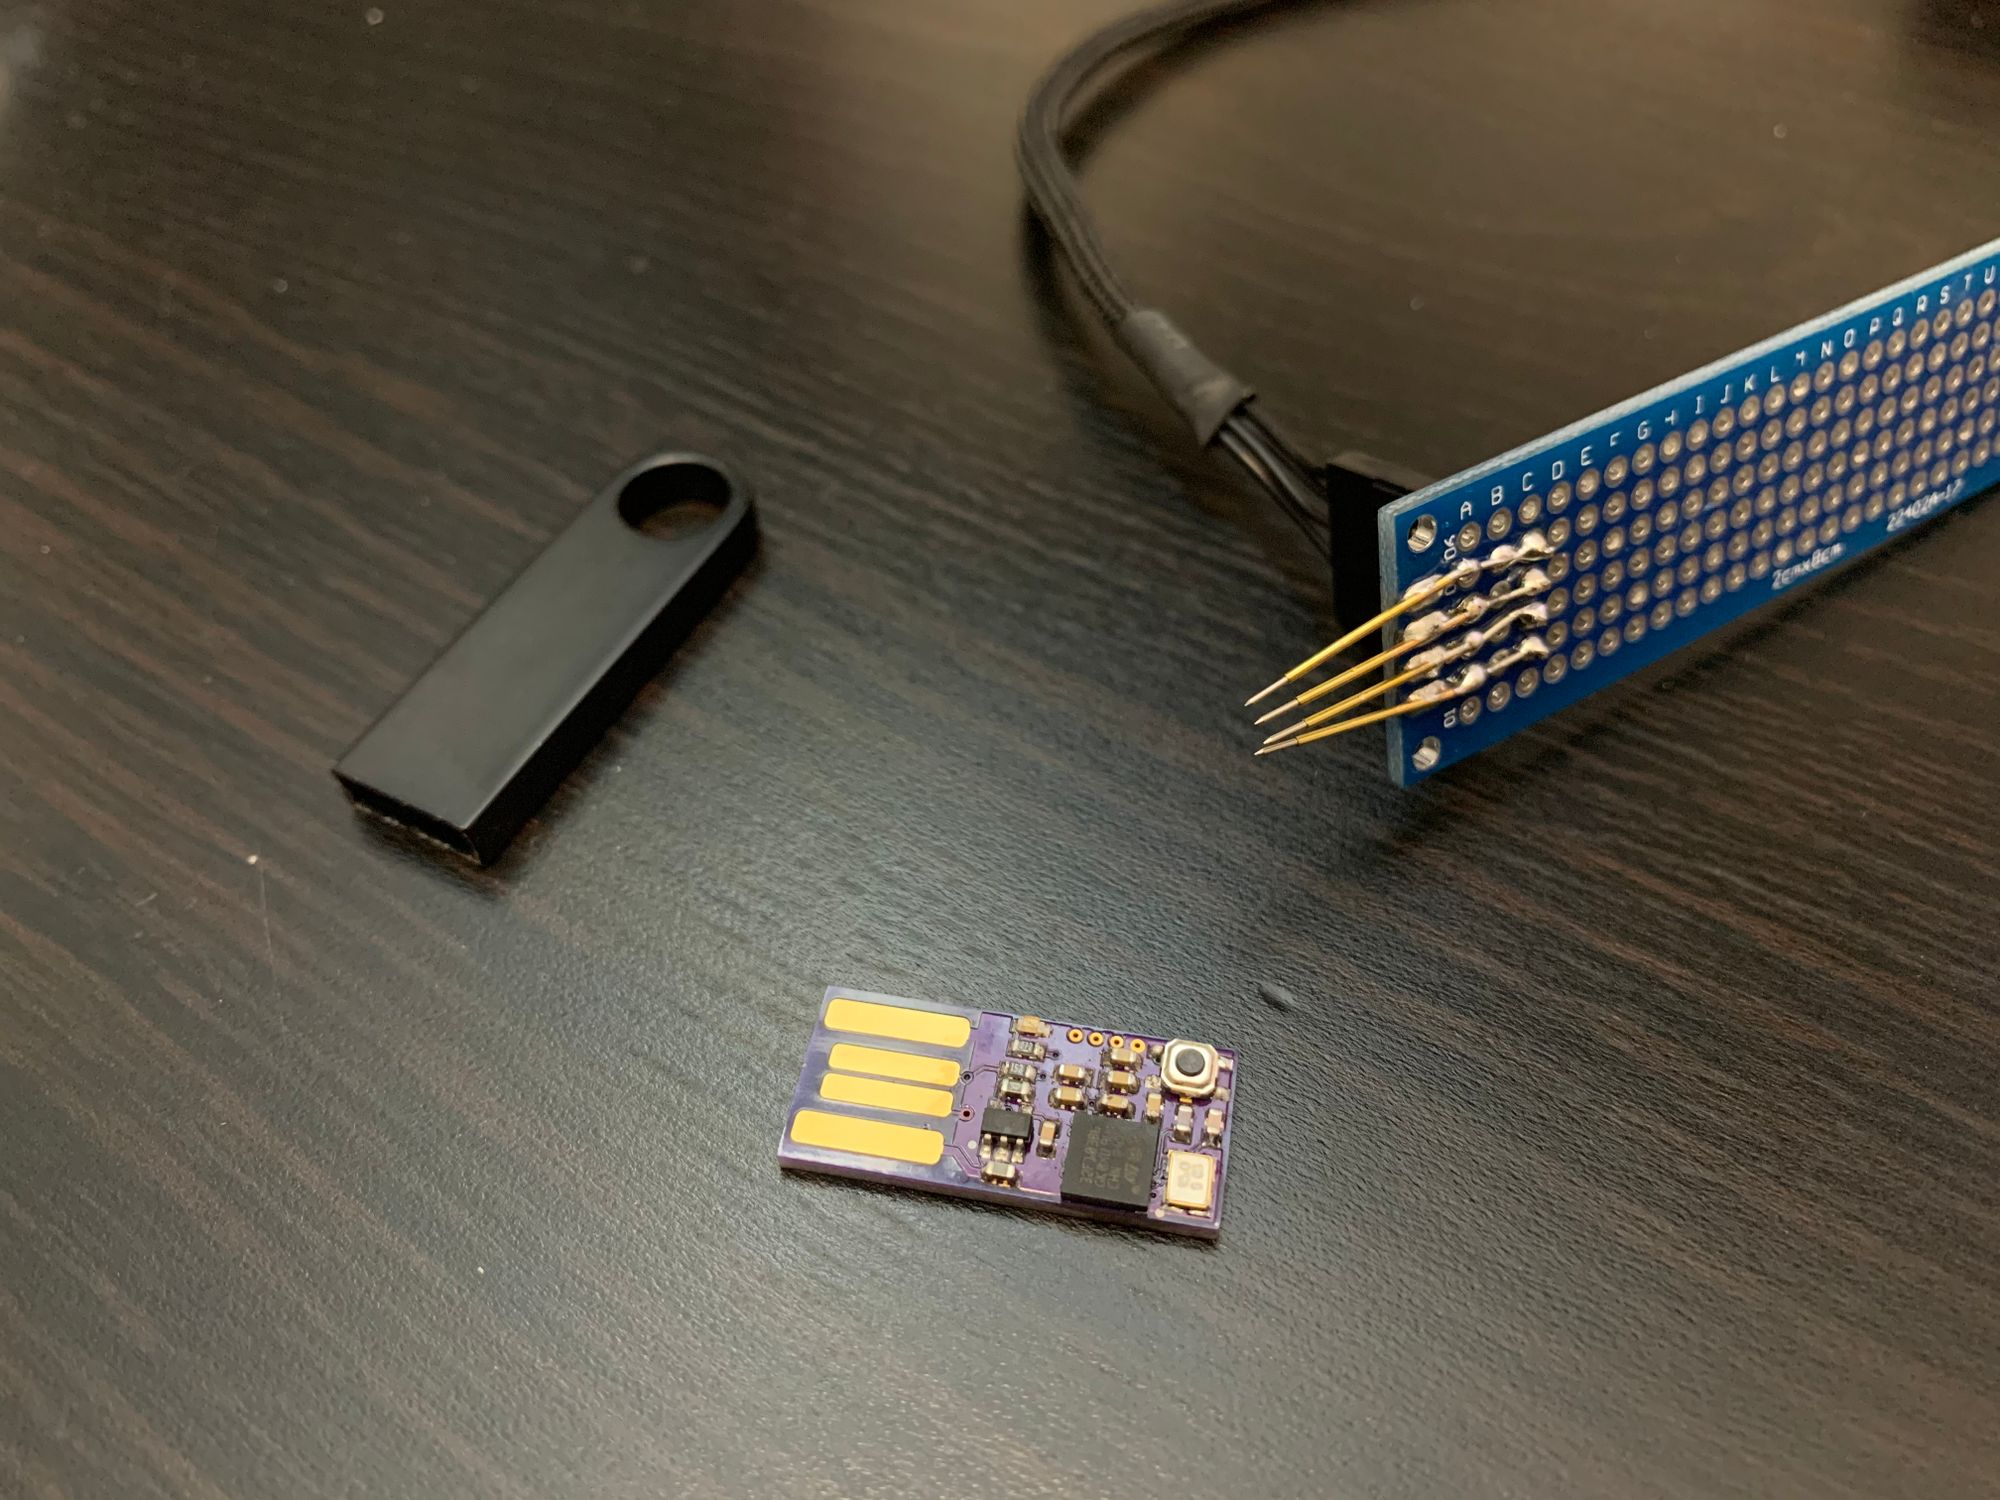
Start by soldering the STM32. New parts are already equipped with solder balls, so this is the easiest part. Apply a small layer of flux on the pads and use tweezers to align the package using the silk screen triangle. The edges should align exactly with the edges of the silk screen. Then apply a moderate amount of hot air (don't blow away the part) until the solder reflows and the part aligns itself. It is very helpful to watch the process from the side using a flash light, the part will sink down a bit and align itself properly.
If you have solder paste, apply small amounts on the rest of the pads, put on the parts and reflow everything with your hot air station.
If you solder the rest by hand I recommend starting with the crystal. Apply some solder to the four pads, put on flux and and the crystal, then reflow with the hot air station.
Check if everything works by applying 5v via alligator clips and measuring VCC (3.3v) on the regulator. If everything seems to be alright and no magic smoke escaped, try and connect to the STM32 via the SWD port.
After writing the GNUK firmware you MUST lock the flash memory of the STM32. Otherwise your key can be extracted by physically destroying the metal shell and reading out the flash via the SWD port.
Updating the firmware
M'key supports the GNUK update mechanism via a Python script. No additional hardware is required, unless you brick the device.
M'key Usage
The default user PIN is 123456
The default admin PIN is 12345678
Please remember to backup your key before transferring it to the M'key. gpg defaults to deleting the local key after transfer to a smartcard!